The latest Shella Shopify theme update, version 3.6.0, includes an updated block for the Instagram widget.
Now you do not need to add and configure the app at your Instagram account, generate the token. You can show the latest posts filtered by the account name or the hashtag.
Please note, filtering posts on Instagram by account name limits only for 12 posts.
If you want to filter by hashtags, the Shella theme will show posts from other accounts too. Not limited only to your account.
Add an Instagram widget
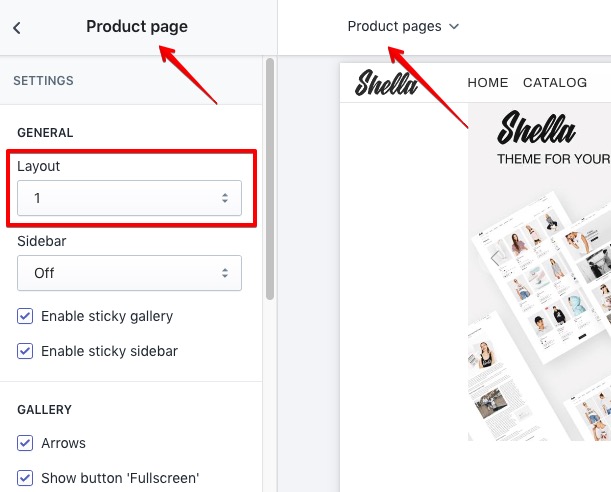
- Go to Online store -> Themes -> Customize
- Add the builder section. Sections -> Add section -> Select builder section.
- Add Instagram. Go to the builder section -> Add content -> Instagram.
Configure the Instagram widget
GRID – Size
You may set the width for the Instagram widget. In the example, I set the width to 8/12 (66.6%) for the Instagram feed and added an image banner with the 4/12 width (33.3%). The numbers 8 and 4 are the number of columns. Total builder width has 12 columns, I set 8 columns for the Instagram feed and I set 4 columns for the banner image.
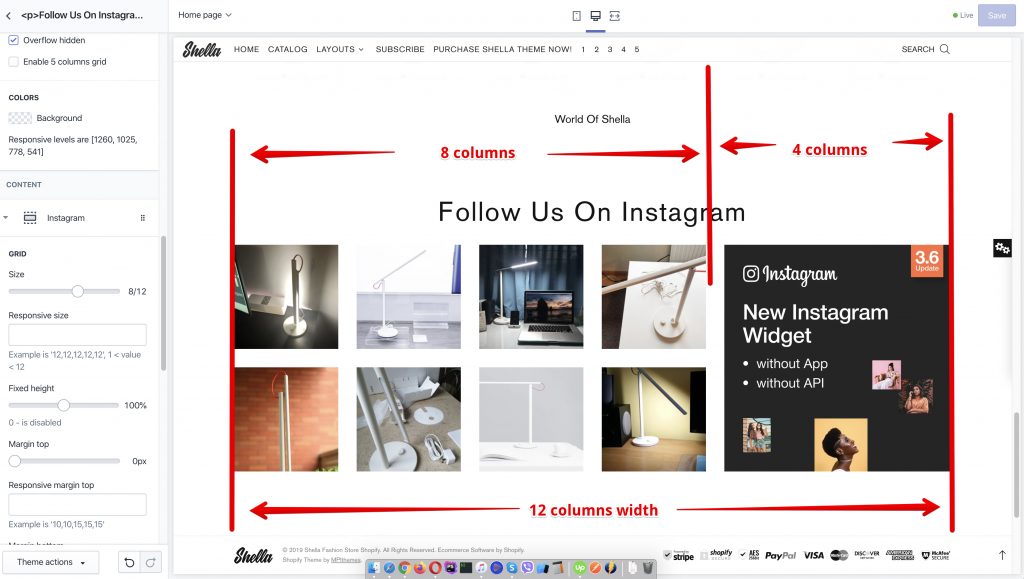
The usual value for this option is 12, which is equal to the full width of the builder section.
SETTINGS – User name
Set your Instagram user name. Please note, the theme will get only 12 images.
SETTINGS – Tag
Set hashtag to select posts for your Instagram widget.
SETTINGS – Show post details
Show the number of likes and comments on mouse hover.
SETTINGS – Disable paddings
Disable paddings between Instagram images.
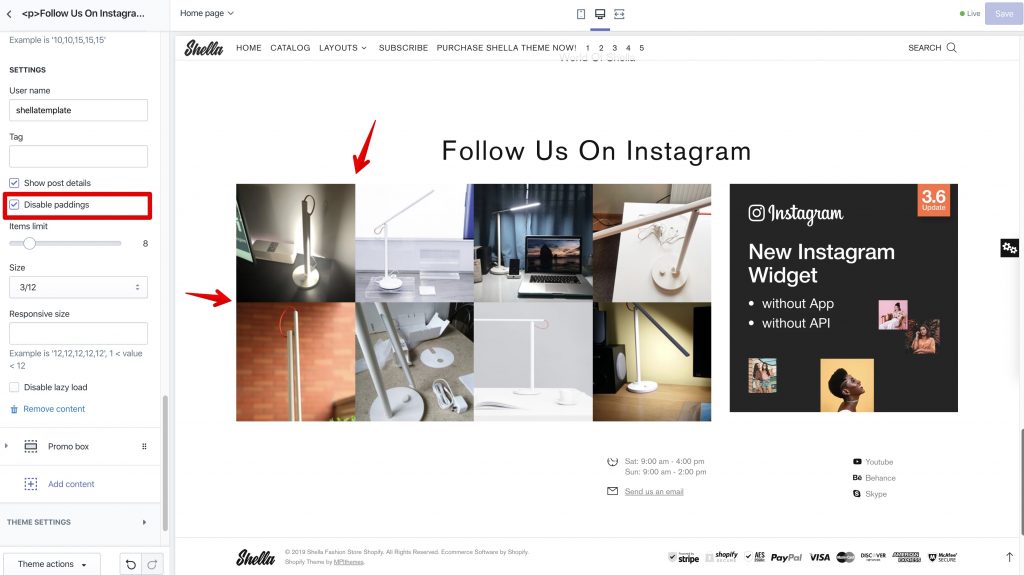
SETTINGS – Items limit
Set the number of images to show in the widget.
SETTINGS – Size
Set the width for each image within the Instagram widget.

If you have more questions about theme settings, please create a new ticket at our support system.
Links
- Shella Shopify theme demo store – https://shella-demo.myshopify.com/
- Purchase the Shella theme – http://bit.ly/2DOThWb
- Submit a ticket – https://mpithemes.ticksy.com